Originally published on Medium – Apache Airflow publication.

Contents
- Introduction
- Installing Apache Airflow
- Running Docker Compose
- Interacting with Airflow UI
- Clean up
GitHub Link — https://github.com/raviteja10096/Airflow/tree/main/Airflow_using_Docker
Introduction
Airflow is a popular tool that simplifies complex workflows. It allows you to programmatically define, schedule, and monitor your workflows, all in one place. While Airflow is a powerful option, installation can sometimes feel overwhelming.
This guide will break down the setup process into two easy-to-follow methods, getting you up and running with Airflow in no time.
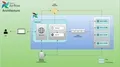
Sample Airflow UI:
Installing Airflow
Airflow Components
We have different services like scheduler, webserver, worker, redis, postgres, flower and postgres which help you to run Airflow.
The docker-compose.yaml file includes the following service definitions:
airflow-scheduler — Manages and schedules tasks and DAGs.
airflow-scheduler:
  <<: *airflow-common
  command: scheduler
  healthcheck:
    test: ["CMD", "curl", "--fail", "http://localhost:8974/health"]
    interval: 30s
    timeout: 10s
    retries: 5
    start_period: 30s
  restart: always
  depends_on:
    <<: *airflow-common-depends-on
    airflow-init:
      condition: service_completed_successfully
airflow-webserver — Hosts the web interface accessible at localhost:8080.
airflow-webserver:
  <<: *airflow-common
  command: webserver
  ports:
    - "8080:8080"
  healthcheck:
    test: ["CMD", "curl", "--fail", "http://localhost:8080/health"]
    interval: 30s
    timeout: 10s
    retries: 5
    start_period: 30s
  restart: always
  depends_on:
    <<: *airflow-common-depends-on
    airflow-init:
      condition: service_completed_successfully
airflow-worker — Executes tasks assigned by the scheduler.
airflow-worker:
  <<: *airflow-common
  command: celery worker
  healthcheck:
    test:
      - "CMD-SHELL"
      - 'celery --app airflow.providers.celery.executors.celery_executor.app inspect ping -d "celery@${HOSTNAME}"'
    interval: 30s
    timeout: 10s
    retries: 5
    start_period: 30s
  restart: always
airflow-init — Initializes the Airflow setup.
flower — Monitors and provides insights into the environment. Available at localhost:5555. (Optional)
flower:
  <<: *airflow-common
  command: celery flower
  profiles:
    - flower
  ports:
    - "5555:5555"
  healthcheck:
    test: ["CMD", "curl", "--fail", "http://localhost:5555/"]
    interval: 30s
    timeout: 10s
    retries: 5
    start_period: 30s
  restart: always
postgres — Serves as the metadata database.
postgres:
  image: postgres:13
  environment:
    POSTGRES_USER: airflow
    POSTGRES_PASSWORD: airflow
    POSTGRES_DB: airflow
  volumes:
    - postgres-db-volume:/var/lib/postgresql/data
  healthcheck:
    test: ["CMD", "pg_isready", "-U", "airflow"]
    interval: 10s
    retries: 5
    start_period: 5s
  restart: always
redis — Facilitates message forwarding from the scheduler to the workers. (Optional)
redis:
  image: redis:7.2-bookworm
  expose:
    - 6379
  healthcheck:
    test: ["CMD", "redis-cli", "ping"]
    interval: 10s
    timeout: 30s
    retries: 50
    start_period: 30s
  restart: always
Airflow Volumes
Besides the common environment variables, we have four volumes: dags, logs, config and plugins. Create these 4 folders in your local machine:
- dags — For placing DAG scripts
- logs — For Airflow logs
- config — For Airflow configurations
- plugins — For extra plugins

Permissions
For seamless volume synchronization, we need to confirm that the UID and GID permissions on the Docker volumes align with those on the local filesystem.
In the YAML file this line provides permissions:
user: "${AIRFLOW_UID:-50000}:0"Run these commands in your local environment:
docker compose up — skipping this step is the most common reason volume mounts fail on Linux. On macOS, UID mismatch errors are less common but it's still worth doing.
echo -e "AIRFLOW_UID=$(id -u)" > .env
echo -e "AIRFLOW_GID=0" >> .env
Your .env file will look like:
AIRFLOW_UID=501
AIRFLOW_GID=0
Full Docker Compose file — Link
Run Docker Compose
Once all the setup is done, run the init command. I’m using Podman — feel free to use Docker or Podman interchangeably.
# Docker
docker-compose up airflow-init

# Podman
podman compose up airflow-init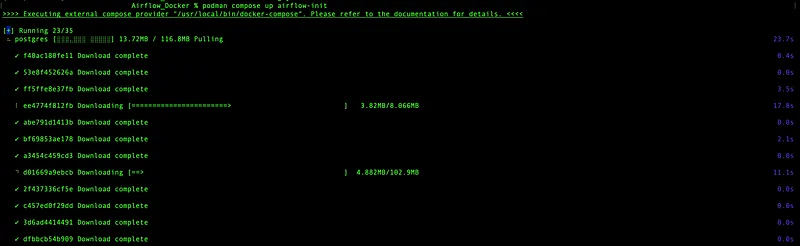
Then start all services in detached mode:
# Docker
docker compose up -d

# Podman
podman compose up -d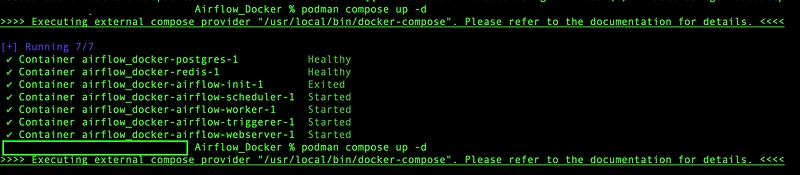
Accessing the Web Interface
Once all containers are up and running, open localhost:8080 in your browser and login with:
- Username:
airflow - Password:
airflow
AIRFLOW__WEBSERVER__SECRET_KEY and admin password should both be set before any real deployment.
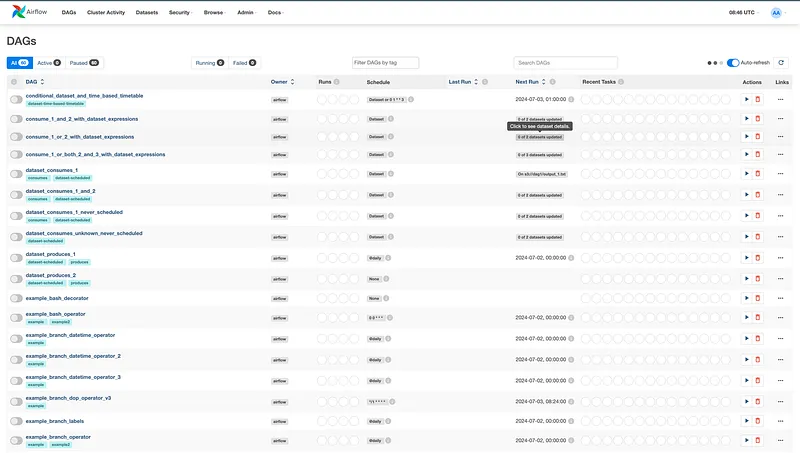
After logging in you can see your DAGs listed in the UI.
We’ve successfully installed the full version of Airflow in just a few minutes using Docker! 🎉
Clean Up
# Docker
docker compose down

# Podman
podman compose down
References
- Airflow Documentation — https://airflow.apache.org/docs/
- Git Repo — Link